How to transfer files between cloud storages: Movebot Review
In today’s digital world, cloud storage services have become the unsung heroes of our digital lives. We rely on them to store our photos, documents, and memories, ensuring that our data is safe and accessible from virtually anywhere. But what happens when you want to switch cloud providers or simply want to back up your files to a different service? Fear not, for we have a solution! In this guide, we’ll explore the art of transferring files between cloud storage services, making it as easy as pie for you.
Embracing the Cloud Storage Revolution
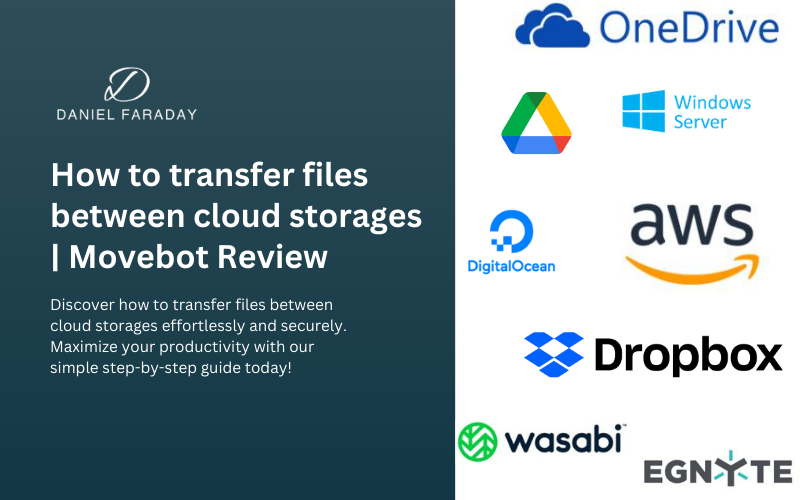
Cloud storage services, like Google Drive, Dropbox, or Microsoft OneDrive, have become as common as smartphones in today’s digital landscape. They offer vast amounts of storage space for your data, making it accessible at your fingertips. But did you know that using multiple cloud storage providers can be a game-changer?
Diversifying your cloud storage services can be a smart move. You’re not putting all your eggs in one digital basket, which means greater security and accessibility. Plus, some cloud services offer free storage up to a certain limit. So, it’s like getting extra closet space for your digital belongings without paying a dime!
But how do you efficiently move your files between different cloud storage providers? That’s where the magic of file migration comes into play.
Mastering the Art of File Migration
Let’s discuss each of the three options one by one.
Method 1: The Good Old Manual Transfer
One way to move files between cloud storage is through a manual transfer, using your local device as an intermediary. Here’s how:
- Download the files from the source cloud storage to your local device. This is like grabbing your old stuff from one room.
- Upload the files to the destination cloud storage, just like placing them in a new room.
Advantages:
- It’s simple and doesn’t require technical expertise.
- You have full control over the process.
Disadvantages:
- It can be time-consuming, especially with a large number of files.
- Your local storage space might limit the transfer.
Method 2: Embracing Native Cloud Transfer Features
Some cloud storage providers offer built-in transfer tools to make your life easier. Services like Google Drive and Dropbox have their own nifty tricks for this. Here’s how:
- Find the built-in transfer tool in your source cloud service.
- Follow the instructions to select the files you want to transfer.
- Choose the destination cloud storage and let the service work its magic.
Limitations:
- This method only works if both cloud services support it.
- Transfer options may be limited compared to third-party services.
Method 3: The Power of Third-Party Tools
For the most efficient and feature-rich transfer, consider using third-party cloud migration services. These heroes of the digital world make transferring files a breeze.
Benefits of Using Third-Party Services:
- They offer a one-stop solution for transferring files between different cloud services.
- Many provide scheduling and automation options, taking the hassle out of manual transfers.
Movebot Review
There are a lot of tools out there. But today we are going to talk about one of the best tools on the internet.
What is the Movebot?
Movebot is a cloud data migration tool that helps businesses move their data from one cloud platform to another. It is a powerful and easy-to-use tool that can save businesses time and money. This is a great choice for businesses of all sizes. It is especially well-suited for businesses that are migrating to Google Workspace, Dropbox, or SharePoint. Movebot can also be used to migrate email.
Movebot is easy to use and does not require any coding knowledge. It offers a variety of features to ensure that data is migrated correctly and securely, such as pre-flight scans, data insights, and performance monitoring.
What can you move using Movebot?
- Cloud Storage – Move files between storage platforms.
- Block Storage – Move between buckets & providers.
- On-prem Server – Move to and from on-prem & clouds.
- Mailboxes BE – Migrate or backup emails.
Benefits
Movebot offers a number of benefits to businesses, including:
- Time savings: Movebot can save businesses a significant amount of time by automating the data migration process.
- Cost savings: Movebot can save businesses money by eliminating the need to hire expensive consultants to perform data migration.
- Security: Movebot uses industry-standard security measures to protect your data during migration.
- Accuracy: Movebot is highly accurate and ensures that your data is migrated correctly.
How to transfer data between cloud storage – Step by Step
Movebot has more than 30+ integration options. But for a demonstration, we are showing you how to migrate data from Google Drive (personal) to Dropbox (personal)
The first time you log into your Movebot account, you can enjoy a 14-day free trial with 250GB of storage, and the best part is that no credit card is required for this trial.
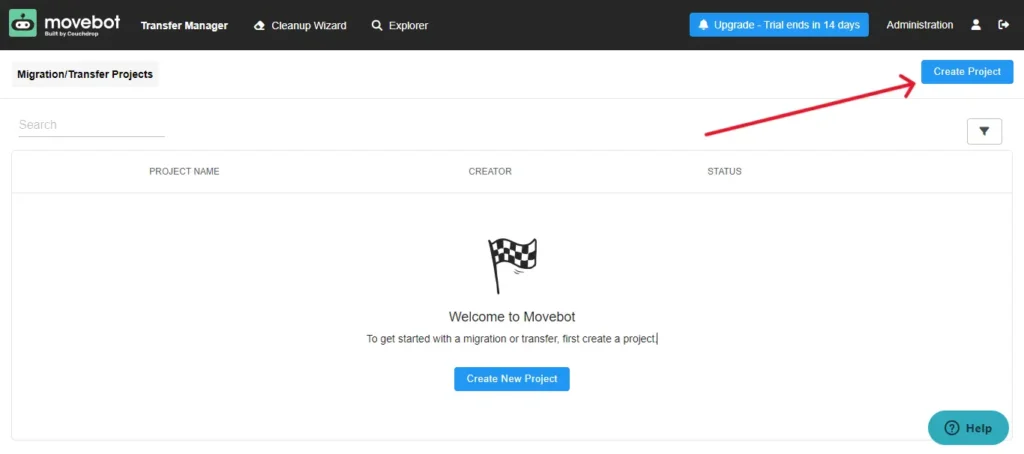
Step 1
The first step is to create a new project. You can do that using the “Create Project” button.
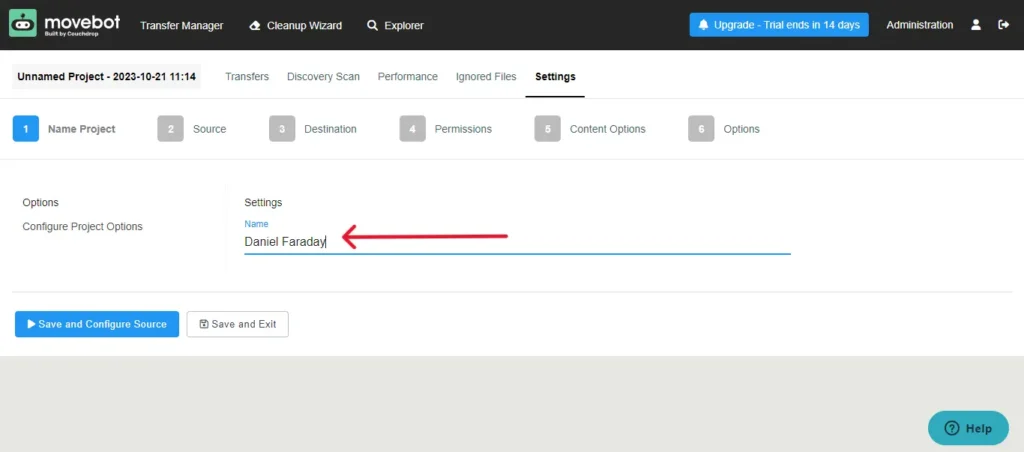
Step 2
In this step, you can name your project and click the “Save and Configure Source” button.
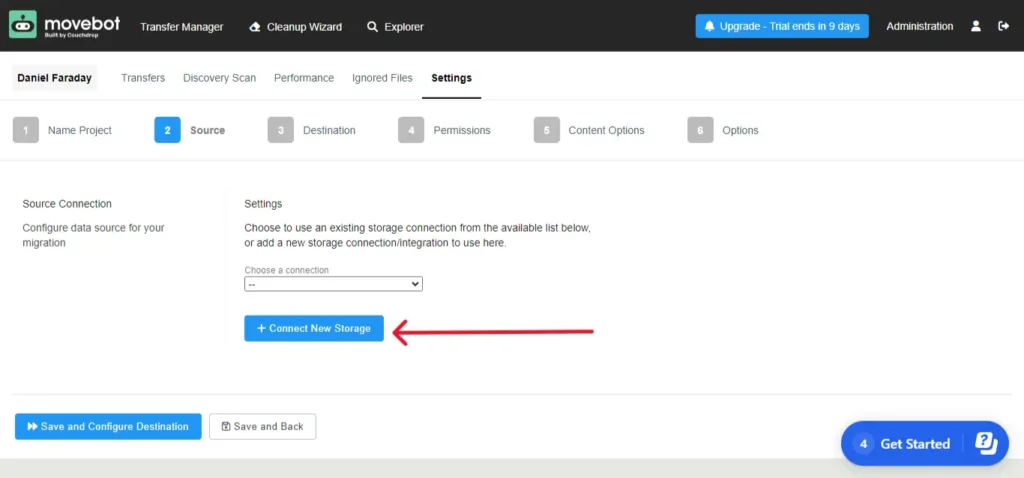
Step 3
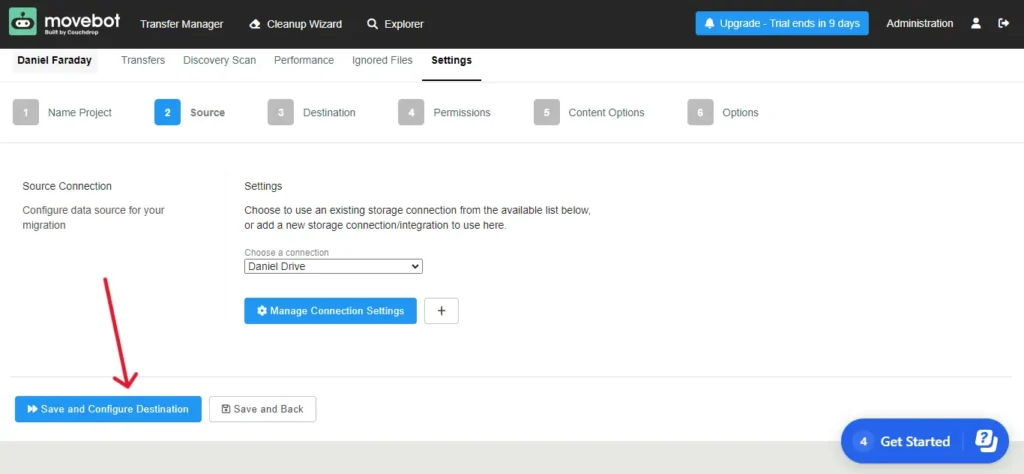
In this step, you can choose your data source. You can choose to use an existing storage connection from the available list below or add a new storage connection/integration to use here. (I don’t have an existing one, so I’m creating a new one)
To create a new connection, click the “ Connect New Storage” button.
Step 4
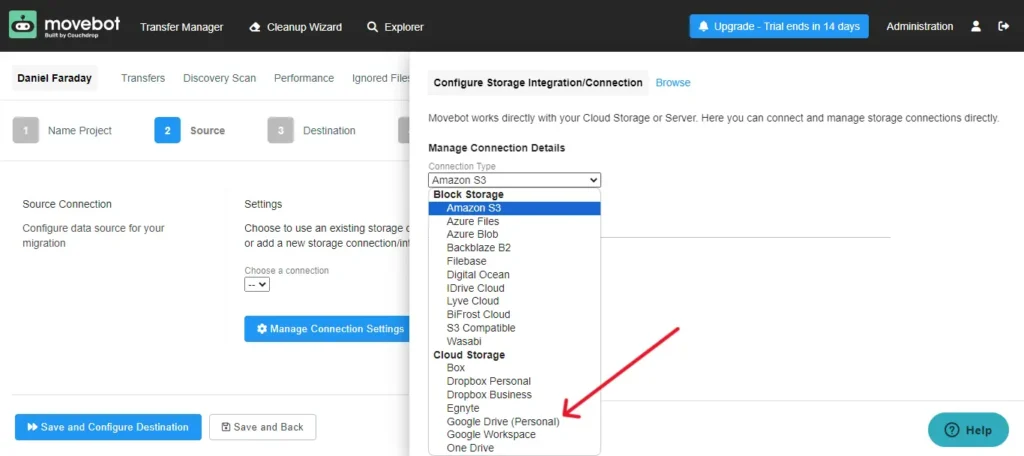
In this example, we want to migrate data from Google Drive to Dropbox. So we are choosing our Google Drive as a source.
Then give a name for the source connection.
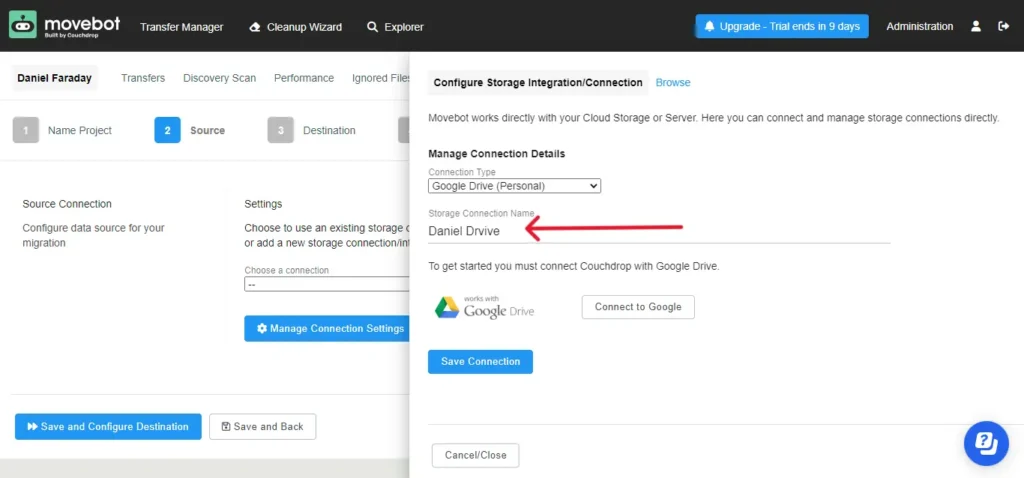
Next, you’ll need to establish a connection with Google. You can achieve this by clicking the “Connect to Google” button. Once clicked, you will be prompted to select your Google account (where your data is stored). Then, you’ll be required to grant access to view, edit, create, and delete your Google Drive files. (You have to click Allow to give access)
Then click “Save Connection”
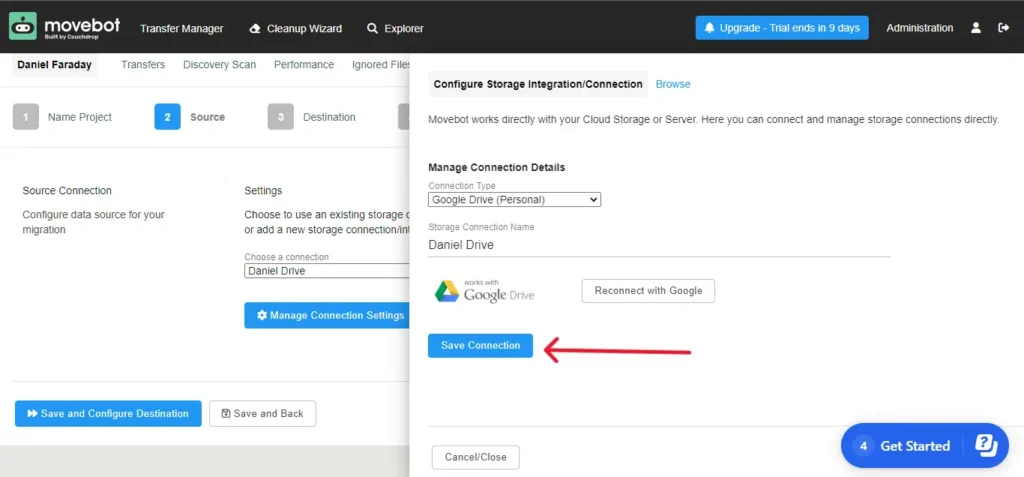
After that, click the “ Save and Configure Destination” button.
Step 5
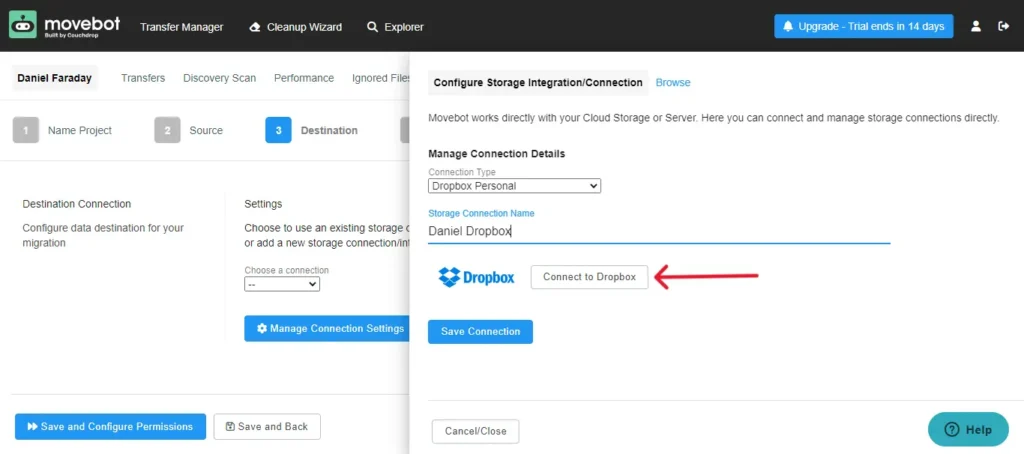
Now you have to repeat the previous step to create a Destination connection. (In this example, it is Dropbox)
Step 6
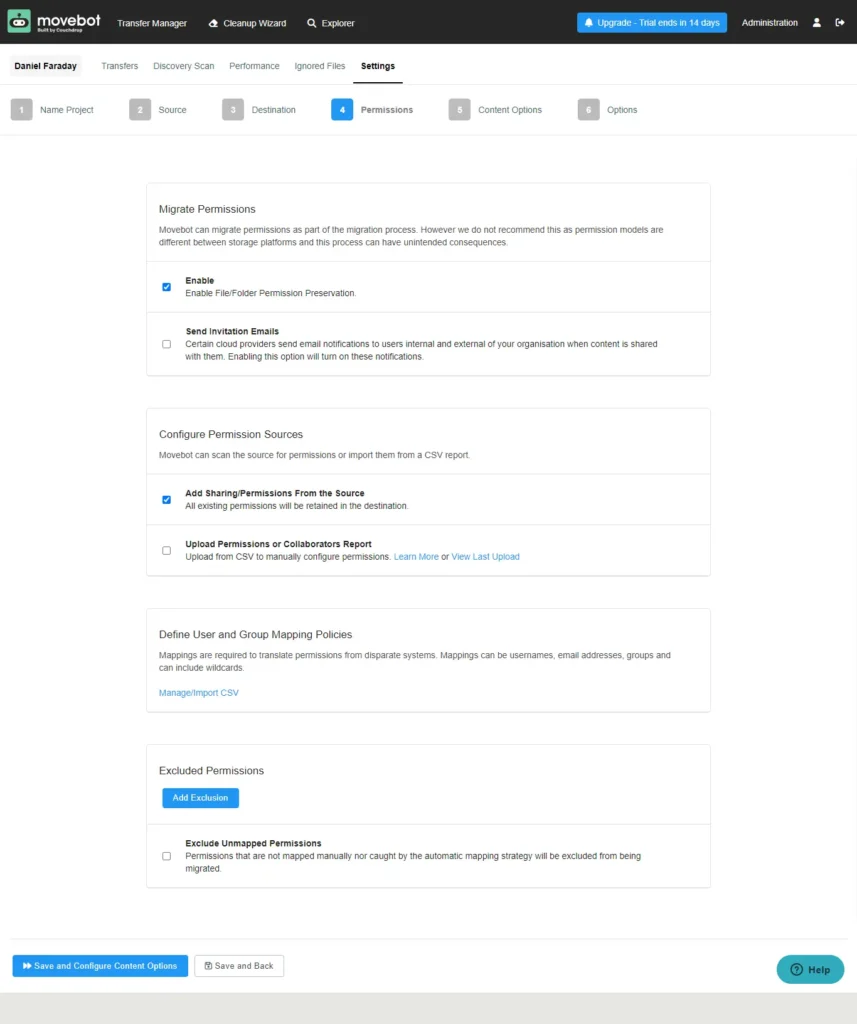
Now you can leave this section as default and click the “ Save and Configure Destination” button.
Step 7
You can leave these settings at their defaults and then click the “Save and Configure Destination” button.

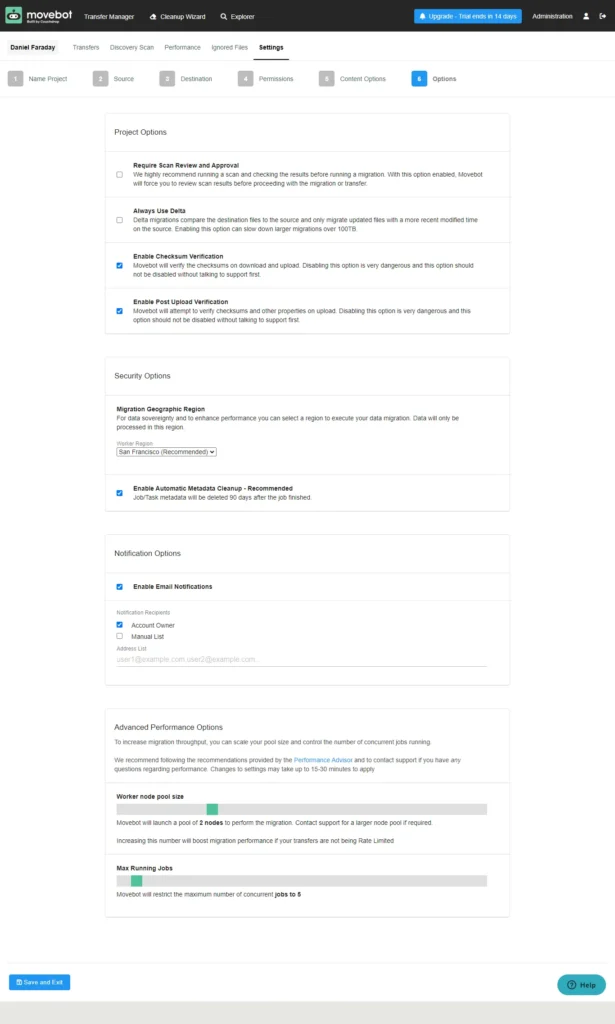
Step 8
Again you can leave these settings at their defaults and then click the “Save and Exit” button.
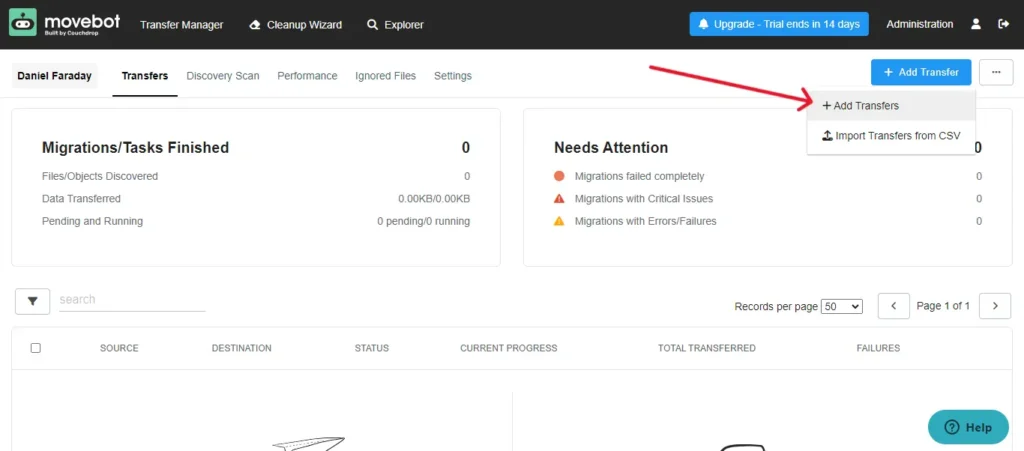
Step 9
Now you have to add a new transfer. click the “Add Transfer” button.

In this dropdown, click “Add Transfers”.
Step 10
Select the items for migration, in this case, from our Google Drive’s “Blog Thumbnails” folder.
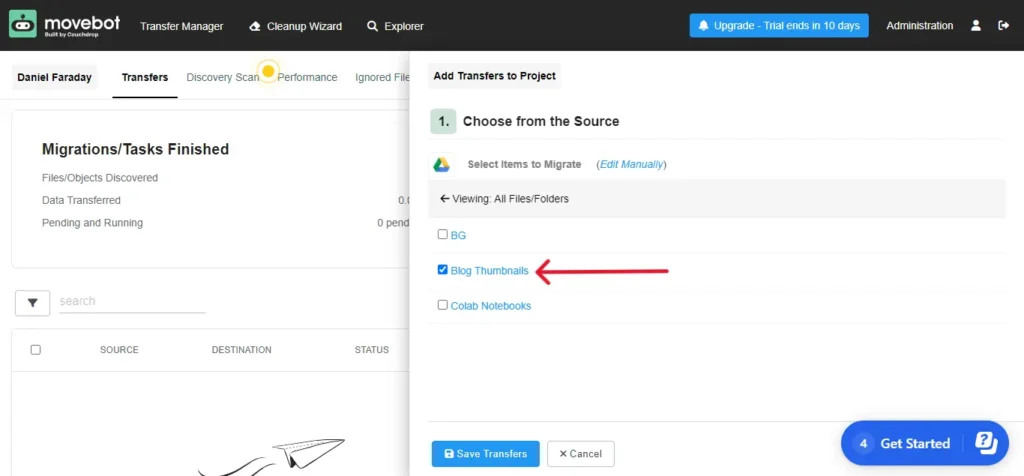
Now scroll down, and select the destination folder.

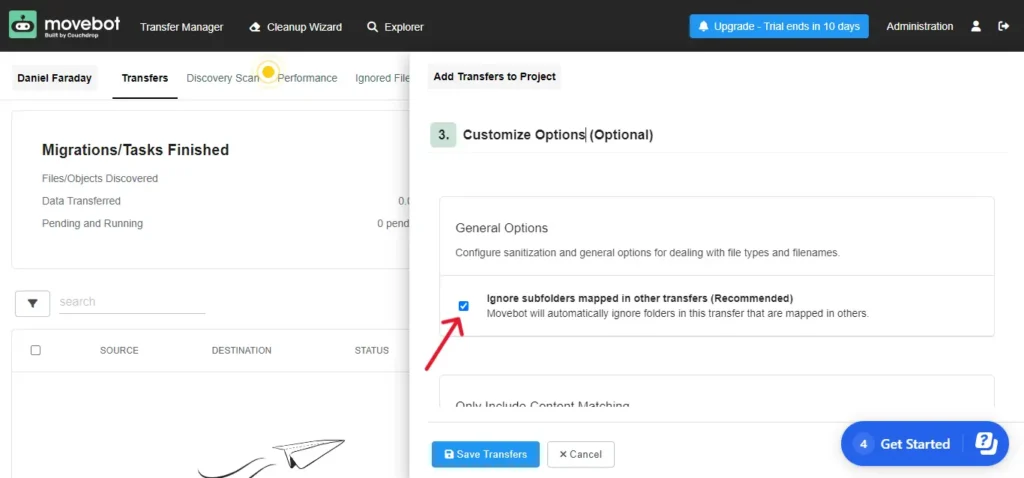
Leave the general options as default. Then click “Save Transfers”.
Step 11
Now click the “Start” button to start the migration process.
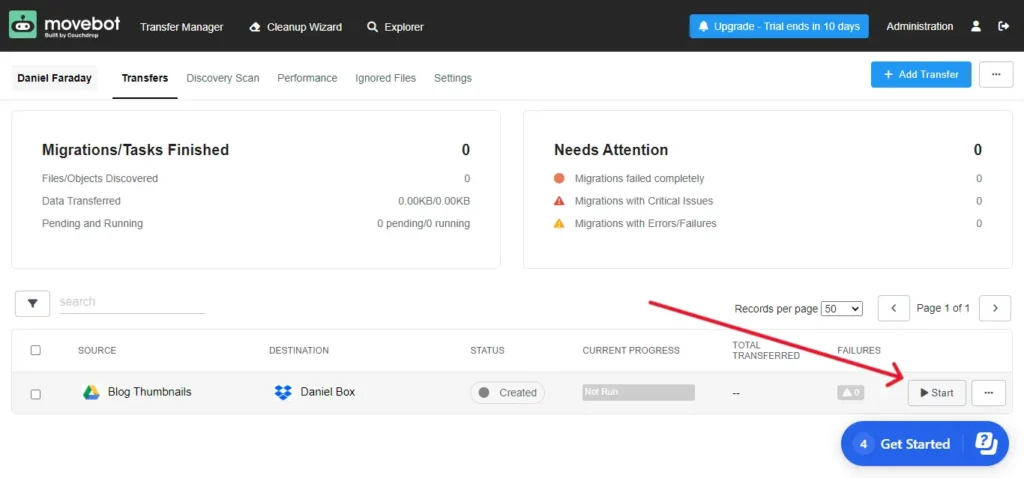
Note: This depends on your migrating file size and internet connection speed.
FAQ
What is Movebot?
Movebot is a cloud data migration tool that helps businesses move their data from one cloud platform to another.
Why would someone use Movebot?
Businesses use Movebot to save time and money on data migration. Movebot is easy to use and does not require any coding knowledge. It also offers a variety of features to ensure that data is migrated correctly and securely.
What are the benefits of using Movebot?
The benefits of using Movebot include time savings, cost savings, security, and accuracy.
What is the pricing for Movebot?
Movebot offers a variety of pricing plans to fit the needs of businesses of all sizes. The pricing plans are based on the amount of data that needs to be migrated.